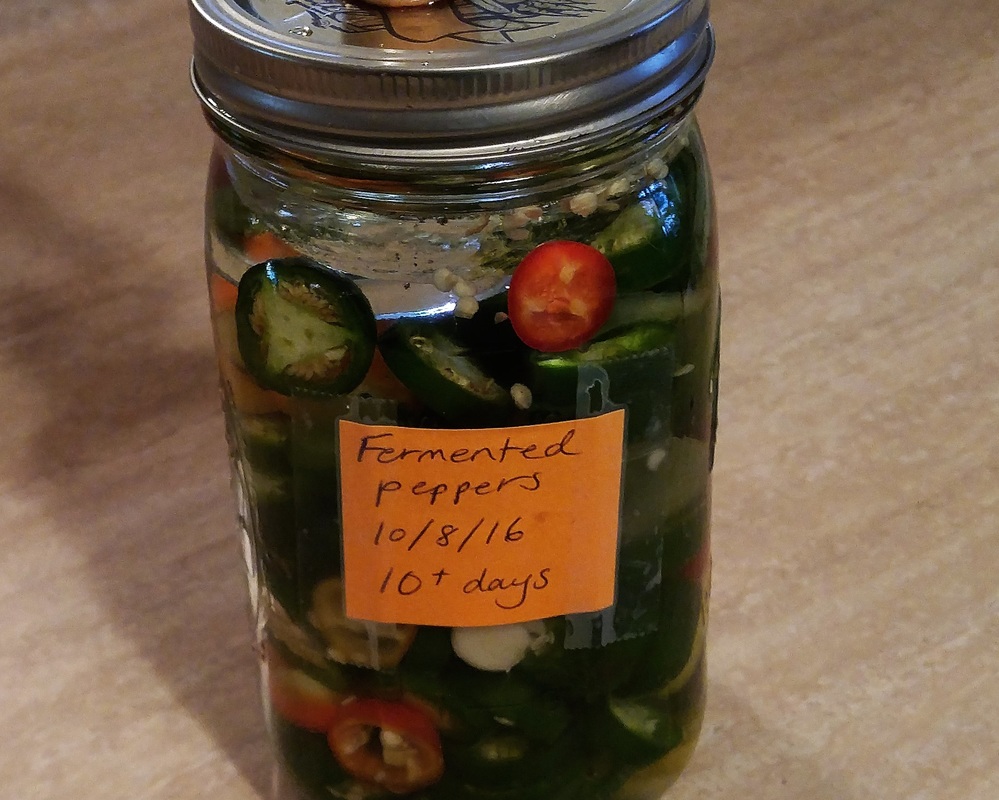
 This recipe for fermented peppers is my absolute favorite ferment. I make it with the abundance of peppers I grow in my garden each year. It works for any kind of pepper. I have used jalapeños, banana peppers, poblanos, and Rio Grande Golds, to name a few. They come out a bit like the pickled pepperoncinis that often come with pizza. I use them in sandwiches, salads, rice or quinoa dishes, and many other ways. Fermentation is all the rage because of its wide array of health benefits, especially in providing probiotic bacteria that are good for digestion. This will just be a short delve into fermentation basics with some helpful links to explore. Fermentation is a type of pickling. You put food in a jar, cover it in brine, and wait for the natural bacteria to digest the food, enhancing its vitamin content and providing an abundance of probiotic bacteria that will benefit your gut when consumed. You use a saltwater brine to preserve and protect the food while it ferments. This is different than vinegar pickles or any type of canned pickles. Vinegar contains different organisms that aren’t as good for you (they’re not bad though) or no organisms at all. Canning methods use submersion in a hot water bath, which kills the beneficial bacteria desired in fermentation. Pretty much any kind of fruit or vegetable can be pickled through fermentation. The result is tangy and sour. Think sauerkraut, kimchi, and traditional dill pickles. 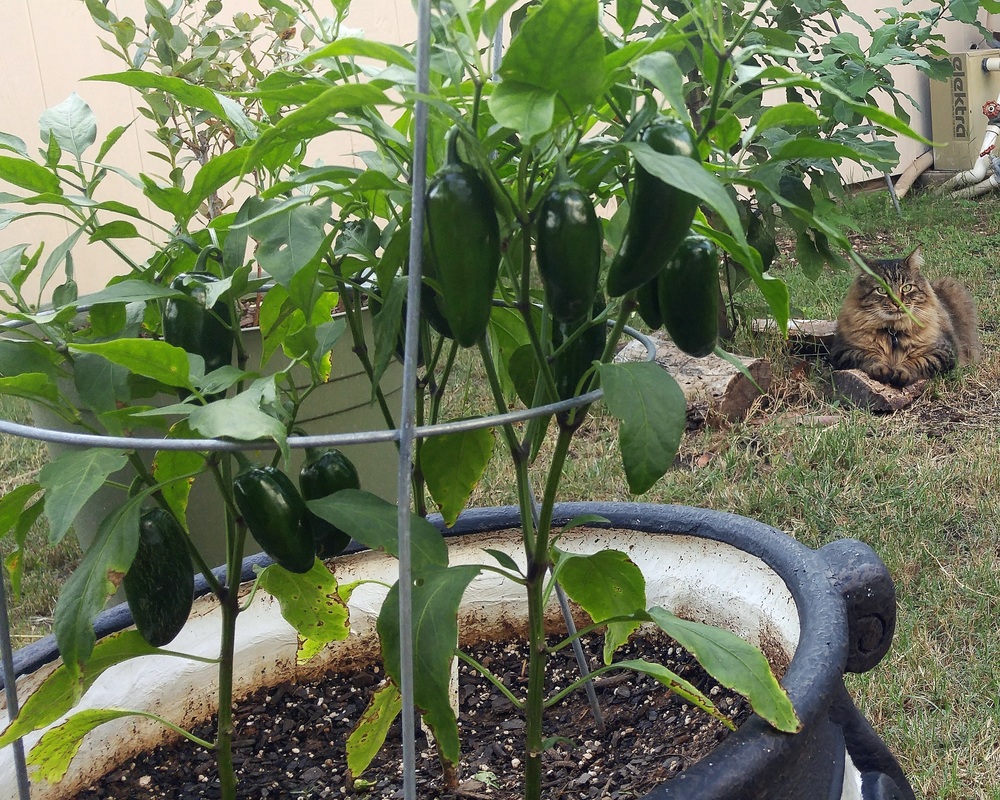 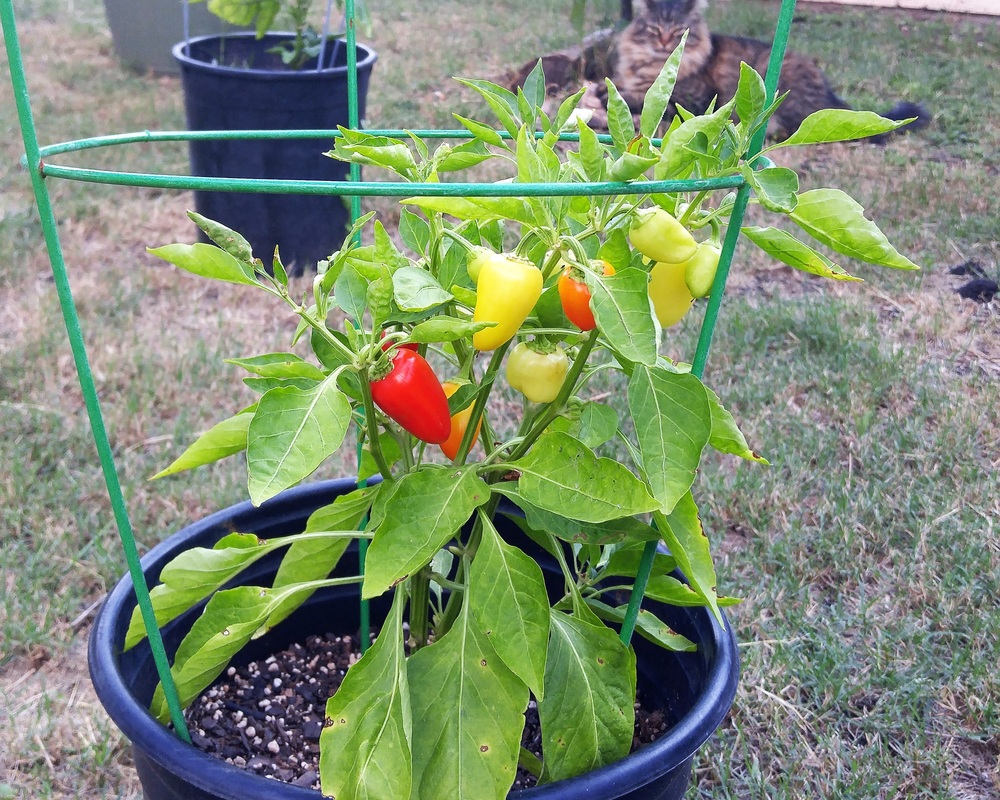 The Bacteria. Fruits and vegetables are naturally covered in the beneficial bacteria we are trying to harness with fermentation. If you use organic or homegrown produce, you can count on having enough natural bacteria to not need any kind of starter culture. You just give them the kind of environment they like and they will flourish. What kind of environment do these beneficial bacteria like? One that is anaerobic and filled with the sugars naturally existing in vegetables and fruit. The bacteria will happily munch away on whatever produce you put in your fermentation vessel. Yogurt is an example of a fermented food that has lots of beneficial bacteria. You can even use the whey from yogurt as a starter culture in vegetable ferments. I prefer not to use whey as a starter because it gears the colony of bacteria toward those that like to eat yogurt. Here is a short article on some of the different types of fermentation. This article has a list of different types of bacteria used in fermentation, highlighting differences between those found in yogurt and vegetables. 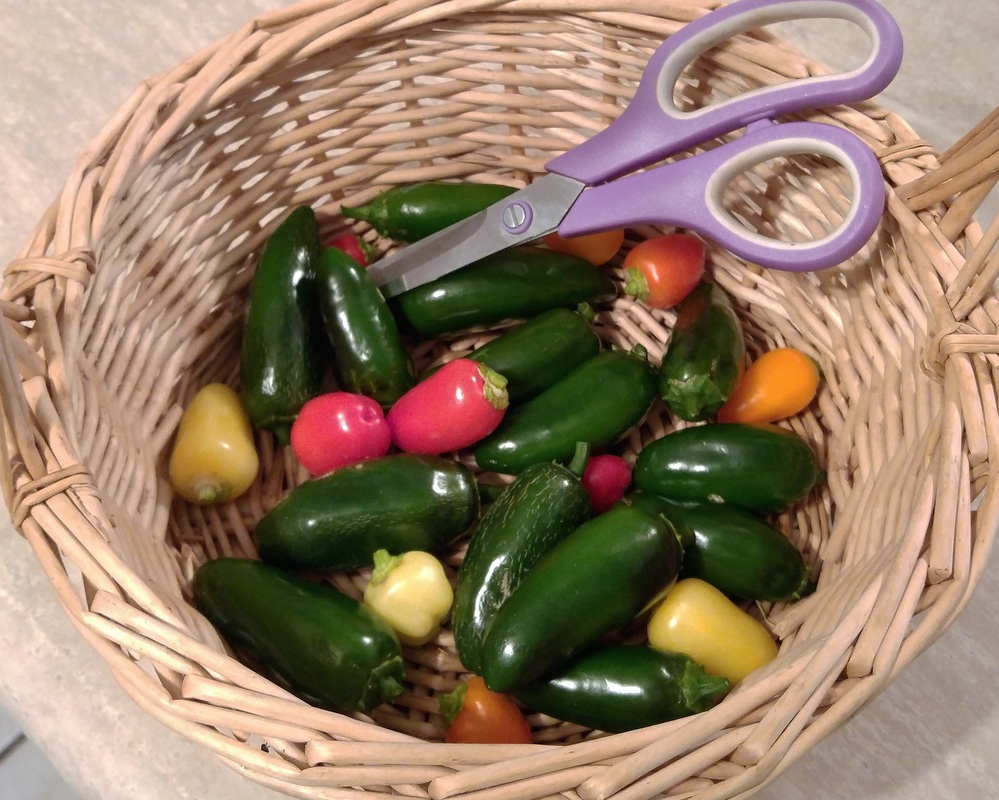 The Vessel. As the good bacteria digest the food, they release carbon dioxide, which builds up in the vessel. You must maintain an airtight environment because the bacteria you are cultivating are anaerobic. If you use a regular lid, the gas will build up, potentially causing your vessel to explode. You can avoid this by burping it periodically, but I have never tried the burping method. Instead, I use an airlock. The airlock maintains an airtight seal while releasing the carbon dioxide. I use wide-mouthed mason jars. My brother fitted several lids of wide-mouthed mason jars with airlocks, following the instructions here. We bought the supplies at a local beer and cheese making store. There are many other approaches. One person did a test of 18 methods, and reported the results here. The Brine. After you fill a vessel with the desired produce, you cover it all in a saltwater brine. This helps stave off organisms that will ruin your ferment, like mold. Most molds won’t grow on salt, so you keep your fermenting produce under the brine, protected by salt. Most people like to use some sort of weight to keep the produce submerged. I use glass crock rocks. Other ideas are to use a stone or a bag filled with marbles. Once the good bacteria have fully colonized your jar, they will help protect the contents from bad bacteria and mold. Sometimes, a little bit of mold or yeast will appear, and your ferment might still be good! You can just scrape it off if it’s only a little bit on the top. Some people disagree and will throw it out. I’m in the camp of saving it if at all possible. Here’s a good article on what to do when you encounter unwanted growth on your ferment. 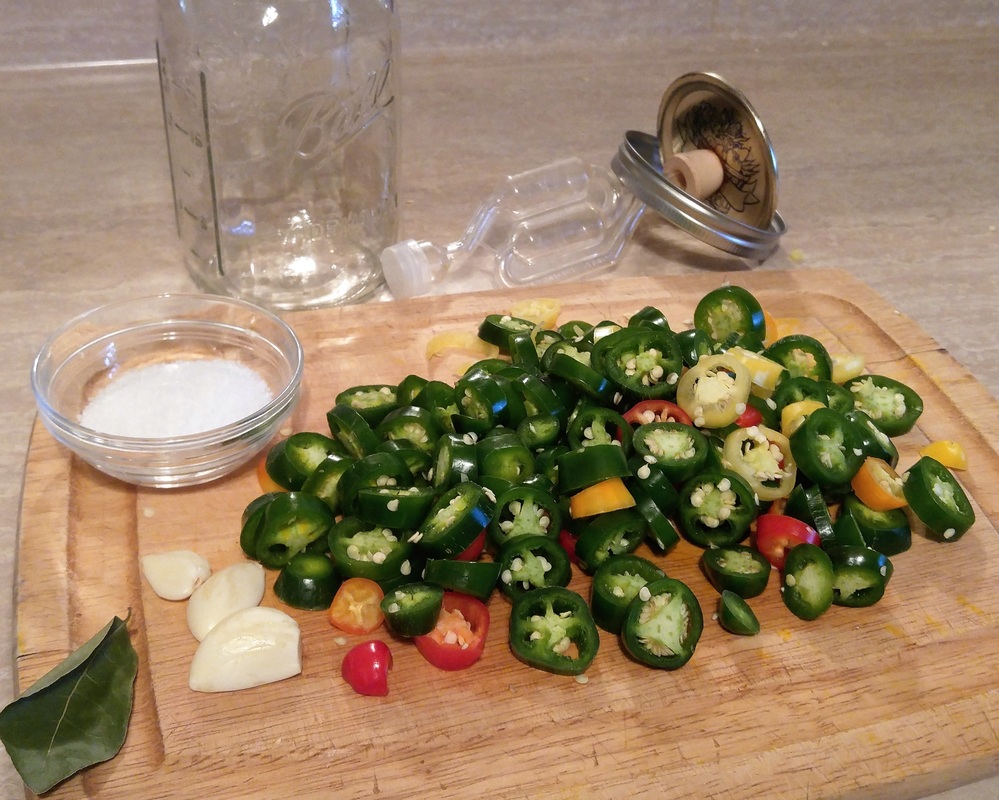 The Wait. Once you have your produce in the jar, weighed down in the brine, and sealed with an airlock, you just wait. Fermentation time varies according to many variables, such as room light and temperature, the bacteria you start with, the food type, and your personal tastes. Recipes will give you an estimate of when you should first check your ferment. At that point, you decide if you like it as is, or want to let it ferment longer. One hint you can look for is bubbling. You should see a good amount of bubbling once the fermentation is well under way. Longer fermentation will have greater health benefits with sourer flavor. I spent a lot of time obsessively researching this topic when I first started fermenting because I craved clear instruction on when it was ready. There just isn’t a single or simple answer. It’s a matter of taste and natural variation. This article helped me to understand how to decide when the ferment is finished. Visit my pinterest board for more fermentation articles, ideas, and recipes. What are your favorite fermented foods and recipes? 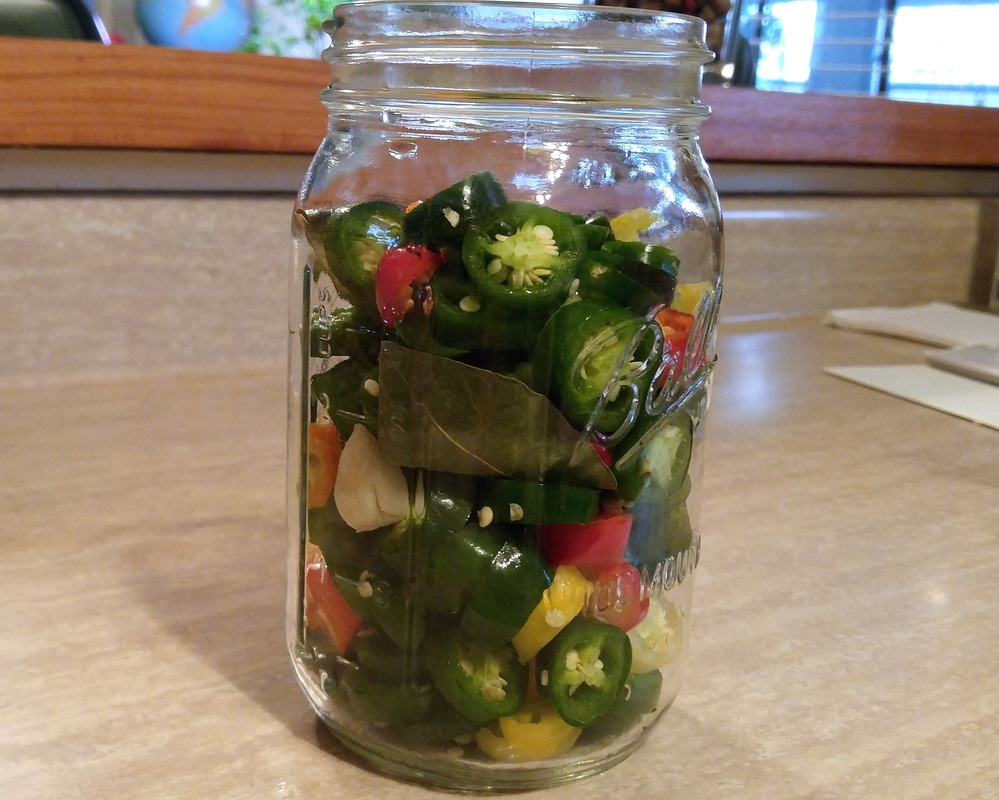 Fermented peppers
Recipe by Hillary Huber Makes 1 quart Ingredients 3 cups filtered water 2 tablespoons sea salt 3-4 cups organic or homegrown peppers, sliced 3 cloves garlic, peeled 1 bay leaf Instructions Warm the water over medium heat. Stir in the salt until it dissolves. Let it cool to room temperature. Fill your fermentation crock with the peppers, placing the garlic cloves and bay leaf among them. Place weights on top of the vegetables, which will hold them under the brine. Pour in the cooled saltwater brine. Seal with an airlock and allow the peppers to ferment for 10 days. Their color will fade. Open the crock and try a pepper. If you prefer a sourer flavor, continue fermenting, testing every 5 or so days. Transfer to the refrigerator. The fermented peppers will keep about 1 year.
1 Comment
Huge
1/4/2022 05:31:59 pm
Love this. Leave a Reply. |

AuthorMy name is Hillary. This blog is about the everyday food I prepare in my kitchen, with tips and recipes for easy, wholesome, and diet friendly meals. I have been chanting "cheese please!" since I was a toddler, although lately I've cut back on dairy. Archives
June 2018
Categories
All
|
